Showing posts with label coffered ceiling. Show all posts

5.5.13

DETAILING: Family Room

 I haven't done a building, detailing post in a long while. Mostly because these posts were a dialogue of decisions made to the top storey rooms as they were being finished. 
The middle level, where we are living, is already completed. The big building stuff anyway. 
I thought I might do some retrospective posts though to show what decisions were made in these rooms and to allow a better understanding of the house as a whole.

So... here is a plan of the family room.


 It is situated to the right after entering the house. It is deliberately kept quite separate from the entry as I wanted guests entering the house to immediately gravitate towards the stairs and the upper level, where the main living area is located. 
There will be a large retractable door / wall between the entry and the family room (rebated track image below) to isolate noise and to provide privacy when necessary. (And yes... those ceiling discolourations are water stains...if you missed the flood disaster, click HERE) 


 A stairwell to the lowest level; storeroom, plant, cellar and garage is accessed from here too. Doorway to lower area seen above RHS.
To delineate the family room from the walkway, we lowered the ceiling in the thoroughfare (marked in red on the plan above) and also added a bulkhead around the perimeter of the room to accommodate a recess for blinds.(green line) This will mean that when not in use they will not visually or physically encumber the doors and windows they were intended to cover. The bulkheads also provided easy insertion of surround sound stereo equipment as this room houses our largest T.V.


The three large panes of glass seen in the picture above (as is J!) are sliding glass doors that completely retract inside a thick nib wall on the left that I further deepened to create a niche for art. This is potentially a major line of view upon entering the house so I wanted it to be WOW! The latest decor incarnation for the niche was discussed HERE and can be seen again below.


We also doubled the wall cavity on the stairwell / family room wall to allow depth for a television niche and again, the surround sound equipment to be built in.


Provision has been made for underfloor heating which every winter I anticipate greatly! The marble flooring....600 x 600 tiles - is bought and tarped on the verandah, waiting till we move upstairs so the tiler can do his bit! (Completed bathroom marble floors shown below)


 We are also intending on dropping in a carpet piece like we did in our last house above.

TIP: A broadloom metre of carpet (average 3.6 m x length required) is cheaper than a rug any day. Even the exy pure wool ones!!! If you recess it into a tiled or timber floor it is easier to vacuum because it's the same height, looks integrated and is usually more cost effective than the hard floor itself on a completed square metre rate. (which you may then wish to put a rug on!..... Go figure!)

So, that concludes the 'family room'. At present it is our only living and dining area but I am looking forward to relinquishing it to the kids and for family entertaining / movie marathons only!

x KL

 Thank you for stopping by my blog. You are very welcome and encouraged to comment. I love receiving feedback! I also love watching a new pretty picture box added to my followers - would love you to join me so I can get to know you too!

9.12.12

Hubby really hit the roof this weekend!

I don't think there would be many people who would celebrate when their spouse 'hit the roof' but, with a builder husband, the term takes on a different meaning!

We were extremely fortunate to have borrowed our Plasterer's sheet lifter so this weekend David and I exhausted ourselves getting the final gyprock ceiling sheets up. No simple task with 6 metre long sheets and a lounge ceiling height of 3.6 metres!


Clockwise from top left, we have now installed the dining room, main bedroom, main bedroom ensuite and stairwell / hall ceilings. With every muscle screaming (I AM NOT exaggerating!), we also sheeted the highest part of the lounge room as seen below. Thank God that job is behind us!


Apart from sheeting the cove section of the lounge room ceiling, we're now up to the walls which are relatively easy and, with only a few large expanses, less of a weight strain! At just under the big 50 age mark, I doubt David or I will ever do this ourselves, again.

x KL

Thank you for stopping by my blog. You are very welcome and encouraged to comment. I love receiving feedback! I also love watching a new pretty picture box added to my followers - would love you to join me so I can get to know you too!

14.10.12

Detailing the Main Bedroom En suite


 Today, I am beyond excited!

After such a   l o n g   hiatus, the wee bit of recent progress has meant that David can order the sheeting materials for the remaining, unfinished rooms upstairs!
The final delivery of Gyprock and Villaboard is on it's way!!!! Yay!!!!!

 Finalising the finish of those rooms has consequently become a high priority.
Luckily it's a process I really enjoy. I'm the 'ideas' person on this build (although David is quite visionary) and detailing means lots of discussion, illustration finding and usually compromise because of budget constraint. 
Architects can provide this additional service and volume builders have pre-prepared finish options that are usually part of their construction contract. In this project - our own home, we are the designers, builder and owner and are therefor fortunate to be able to modify as we go and as rooms take shape.
If I had the budget though I would always engage an architect for this; their skill and creativity add that elusive WOW factor every time!

I thought I'd post our detailing process, starting with the Main Bedroom En suite.


The basic plan for this room was established at the drafting stage and submitted to council. The generous 4200 x 2500 mm space allowed multiple layout configurations but the floor to ceiling windows on the left and top left of the room limited this area's use to a freestanding tub.  I like walking into a bathroom and facing the vanity hence it's location, which left the right wall free for the shower and W.C. The plumbing was installed with the initial frame build and is no longer negotiable. So now for the detailing! This is where those ideas files become gold!


We have magnificent ocean views and the large windows were chosen to balance an identical pair in the Guest bedroom underneath. Just outside the en suite will be a small lounge area within the main bedroom (position photo taken from) and to maximise those views the doorway was enlarged and two cavity sliding door units installed. During the day, for privacy reasons, (duh!) we decided to pop the loo and shower into frosted glass door cubicles. This means still utilising natural light and keeps the room feeling expansive. I first spotted the idea after staying at The Westin Hotel in Sydney.

The Westin Hotel, Sydney Bathroom detail
The windows will need to be well covered at night though, so block out blinds will be installed. I really wanted sheers in front but haven't got enough room between the window and bath. My absolute dream was Plantation Shutters but we can't do this due to the louvre windows already installed.
 *sob*.
 I've asked David to 'box-out' the top of the windows and build a small bulkhead over the vanity so the blinds can hide in their own little slot when up. It protects them from dust too.


A blind 'slot' in J's semi finished bathroom
We lowered the ceilings in the cubicles so that we can have a 'cove' light on the back wall and so that the water from the ceiling integrated rain shower (posted about HERE) isn't cold before it hits you! LOL!

We have this type of indirect lighting in the main bathroom downstairs too.
A wall between the shower and toilet will incorporate a wide shampoo shelf and there will be heated towel rails on the nib wall between the shower and toilet doors.


I wanted to make this space feel really indulgent so display space was important. I was horrified at the cost of freestanding bath outlets too so solved both these issues with a deep alcove at the foot of the bath which will also accommodate a standard bath spout. We spent ages working out how to incorporate low voltage lighting to each shelf for mood but gave that idea the flick in the end. I don't want the room to be O.T.T, just elegant and serene. (And isn't that what fragrant candles are for?)
Less is more. Less is more. Less is more.

The image on the right was my inspiration for a display alcove.
 The vanity will be wall hung as planned elsewhere, with mirrored shaving cabinetry above.
We're adding lighting under these cabinets and providing power inside to hide all the ugly but necessary bathroom stuff like electric toothbrushes, shavers and hairdryers. The picture below looks pretty much like my mental image though we will have budget conscious semi-recessed basins.


The finishes will match those in the downstairs bathrooms; swishy marble floors and cost effective 600 x 300 white vitrified tiles. I loved the shell mosaics I chose for the Terrigal project and featured in the en suite above and am debating whether to use them as a splash back detail too. Then again, using the same marble that's on the floor would look good too. I have a bit more time to ponder that decision. If there's flooring left over it will seal the deal. The Mother of Pearl mosaics are very expensive even if used for a tiny area.

These are the fixtures which I have chosen so far:

Gerberit In-wall cistern
Caroma Cube Wall hung Toilet
Sussex Scala Basin Mixers
Parisi Box Semi recessed basins
Kado Lure freestanding bath
Kado Quad heated towel rails
Rogerseller Cloud Cover shower


This was a mammoth post....hope it wasn't boring as bat sh*t for you!
Would love to hear your much appreciated feedback on my plans!

UPDATE EDIT: 3.01.13
http://eternalicons.blogspot.com.au/2013/01/new-yearnew-progress.html 

x KL

Thank you for stopping by my blog. You are very welcome and encouraged to comment. I love receiving feedback! I also love watching a new pretty picture box added to my followers - would love you to join me so I can get to know you too!

11.10.12

Progress pics!!!! Woop! Woop!

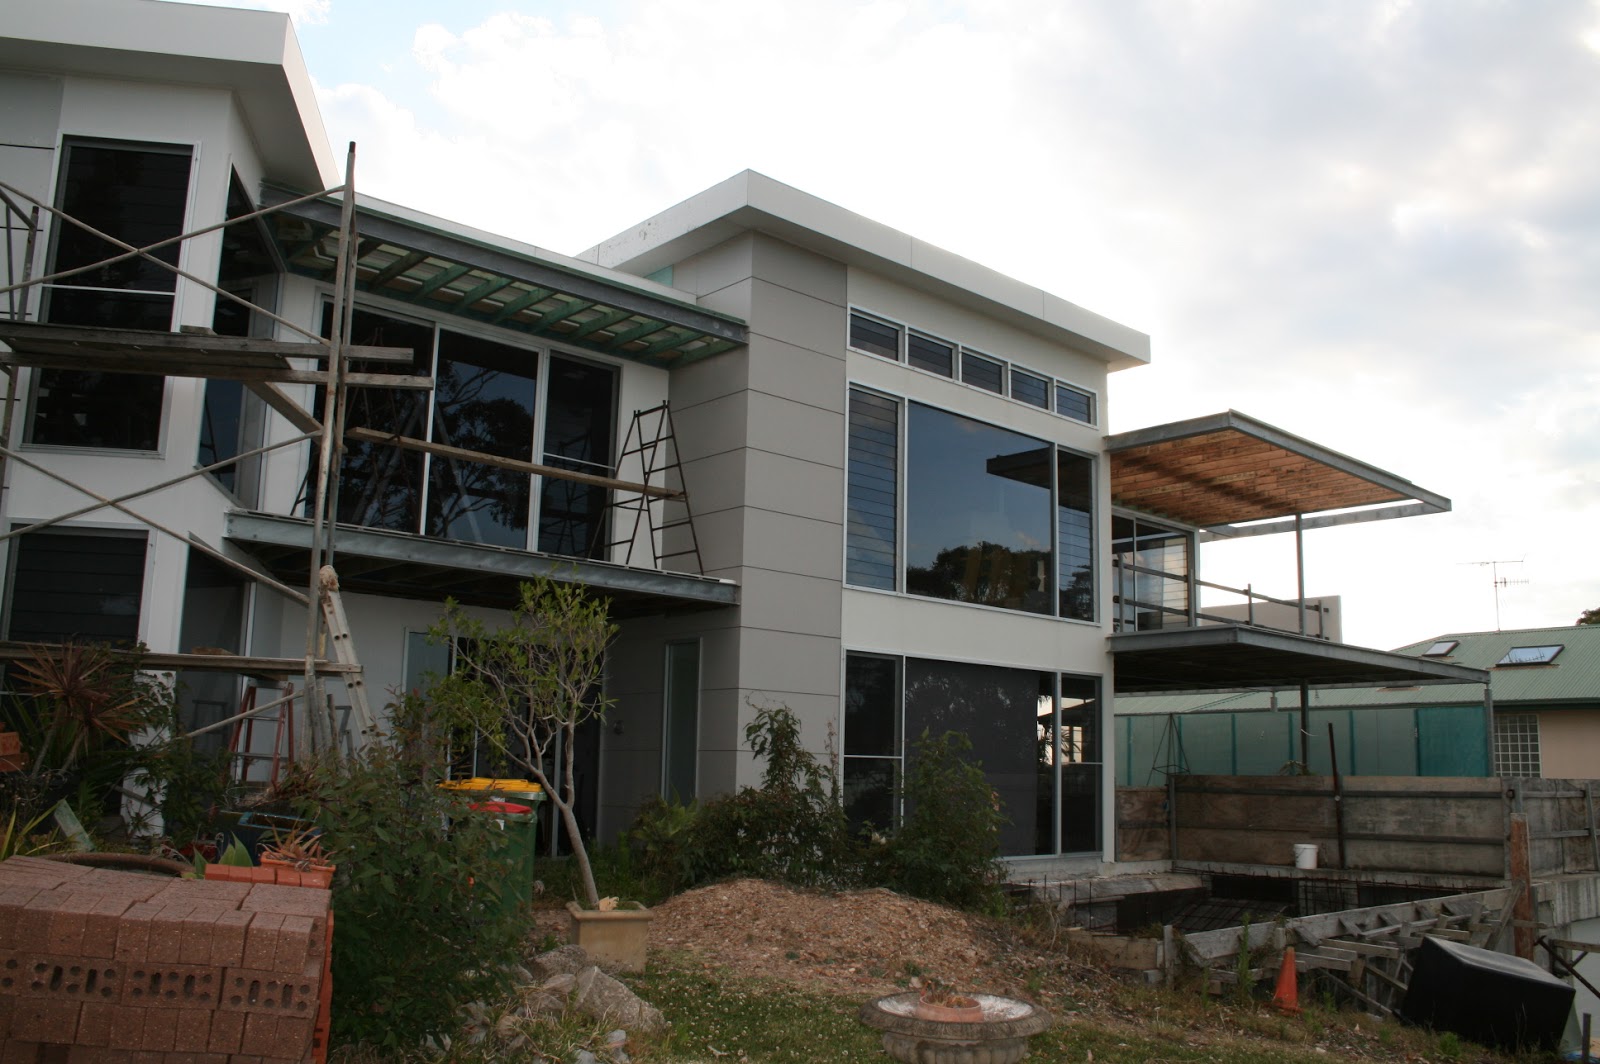
 The exterior of our place had not changed much from the picture below (snapped about 18 months ago) till recently.


But the snap above, taken on the weekend, shows some progress! Blueboard privacy wall to lower deck area on far RHS, the solid handrails to the upper deck, again on RHS of picture and most recently the framing for the two front, upper deck roof areas which were previously just steel skeletons!
Of course the weeds and mess in the front yard has increased exponentially. LOL!

It might not seem allot BUT, the Ripple Effect applies to construction too. To do x, a, b and c need to be completed first and once x is done, y and z are easy peasy! Are you still with me?


 In order to gyprock and Villaboard the remaining upstairs rooms (main bed, ensuite, lounge, dining and J's bathroom / powder room), all this 'stuff' had to go. Hence this timber pile has now become the veranda roof! The insulation will go into the walls and ceilings just prior to sheeting and I've been eBay-ing and filling Vinnie's Bins like a mad woman! Below is the result! Da Dah!!!!
David even drew the bed on the floor for me so we could work out the lighting placement!


 Final decisions about the lounge fireplace design have been made and this crude cardboard cut out helped in this major decision. There ARE some benefits of building slowly and living in the build at times!


Apologising to all the clever IT knowledgeable persons reading; I had 'a go' at the rendering above. Roughly to scale, it reinforced that we are on the right track!
It may have taken me 4 hours....but has given me priceless confidence!

You can see in the image above too, the 'coved' ceiling which will hopefully look something like this:

And the bookshelf I'm planning for the LHS of the fireplace, whose inspiration you've seen before HERE, is below.

Exhausted yet? I am! Tell me your thoughts...please!!!!
Still got lots more to share too...

x KL

Thank you for stopping by my blog. You are very welcome and encouraged to comment. I love receiving feedback! I also love watching a new pretty picture box added to my followers - would love you to join me so I can get to know you too!

31.7.11

Dinosaur egg discovery and getting plastered!

Well, no wonder the house isn't finished! I keep shopping for the bits to finish it before I buy plaster for the walls! Far more interesting I reckon!!! This is my latest acquisition!

My son thought it was a dinosaur egg.... but it's really a very large, white, organic shaped planter! How cool is it!????? There's an off -set hole on top and I L.O.V.E. it!!!! It's doing the temporary residency thing on top of storage boxes in the finished playroom. We're clearing the main lounge area in preparation for plastering too!
Current state of the upstairs lounge room.

The room behind the lounge is our to-be-main bedroom and is still full of stored 'stuff'! I'm really looking forward to seeing the coffered lounge ceiling go in because it will have recessed lighting that runs around the ceiling cove like this picture below (but ours will be all square set):


I'm still hoping for a chandelier too but dear old darling hubby still needs convincing. I've got my eagle eye on this one , should I be so lucky!!!!

I snapped this photo at Coco Republic. Drool!!!!

Then again, maybe I'll just bless his cotton socks for the plaster!
x KL