Showing posts with label fireplace. Show all posts

8.9.15

Year of The House: August update


  #YOTH15 update for Sea-Spray #2: 

  AUGUST
Custom entertainment unit joinery for playroom delivered and assembled, steel base ordered and delivered, Stone top ordered.

Identical to the unit in our Family room seen above, but with a freestanding base!

 Still Painting the house.... 

 
Four deck areas tiled and sealed. Only the pool area is now to be completed.

More plumbing and gas-fitting completed.
  The custom joinery robe for the Guest bedroom has been installed ready for painting.


Ordered the fireplace for the main lounge. Yippee!

Sample Image: Ours will have logs / coal and be square set
  Kitchen and Laundry joinery ordered!
 (YUP....We've committed to BLACK!!!!)

Ordered Stone Walling feature stone:

Eco Outdoors Lichen Split Stone Walling

Designed and ordered custom steel handrail for internal stairs. 

Some inspiration pics and fixing ideas....
Frame less Glass balustrades for top decks ordered and delivered.

Booked Carpet installation dates!!!! *Happy Dance!*

Ordered Faux Grass for Poolside deck area.

Trying to get fencing contractor quotes...everyone is so busy after the storm damage earlier in the year!

I just want simple, colorbond fencing....

Next month, we anticipate lots of these orders will  be delivered / installed.
September should be a Progress-Packed month!


Renovating? Building? Got some House Projects to complete?
Join in! #YOTH15
(also on instagram of course!) 

Missed the progress? Catch up here:
February / March
January / February

x KL
Thank you for stopping by my blog. 
You are very welcome and encouraged to comment, I love receiving feedback!

23.8.15

Come on baby, light my fire...

 The time has come to turn our attention to our lounge room, proposed fireplace.

Our choice back HERE was for an Ecosmart, Bio ethanol Fireplace
When we designed the house, we knew we wanted a fireplace to be the focal point of the main lounge.
 I was keen to have a room without a television...somewhere for adult entertaining with no black-box in sight! (Televisions are installed in the playroom / snug and family rooms). 

We initially installed gas fittings, anticipating a gas insert but after seeing the Ecosmart display at a Grand Designs Show, we were swayed by this new, clean fuel and visually more substantial option.
The room is large so the scale was, in my opinion, perfect. 
Fast forward to this year (The Year of The House!) and we have spent the last few months designing our custom made fire box and obtaining bio ethanol burner costs. Those quotes, now in hand, have almost tripled since we first entertained this option, as more information about bio ethanol use has become available with its increased adoption.  Many commercial establishments, and early adopters, are now removing theirs due to high fuel prices and health concerns relating to the lack of flues. 
Long story - short? We were back to the 'drawing board'....


With the fireplace surround already framed and gyprocked to accommodate a 2 metre firebox, without major re-hashing, we had very limited options:

Lopi Linear: 1550 mm wide


Real Flame Simplicity: 1800 mm wide

Jetmaster Horizon: 2000mm wide
To be honest, the Real Flame was my preferred choice. 
The representative met me on site (the only one to do so) and was extremely professional. I loved the product, the variety of options and the overall look of this fire compared to rivals. This company even do a 3300 mm version. W O W! And money-wise it was a very close call.
But balancing the look I wanted with size (width) and budget had me ordering the Jetmaster Horizon Lowline Inbuilt in the 2000mm wide option (I customised the log / coals feature)


I've ordered a 'frameless' version so we can square-set the plaster up to the firebox. 
It's not a deep nor as high as we'd wanted but for our budget, and the pre-built wall cavity, still creates the grand focal point we initially desired. It has a one month lead time which is also pretty good too...


Above is how I hope it will look...

P R O G R E S S !


x KL

Thank you for stopping by my blog.
You are very welcome and encouraged to comment, I love receiving feedback!

1.8.15

Year of the house: July Update


So...., here is the latest #YOTH15 update for Sea-Spray #2: 

 JULY
Custom entertainment unit for playroom ordered.
Rendering is now 98% complete!
David painting the rear of the house as I type....


Tiling of two top external decks complete!


 The largest top deck area is waterproofed, screed-ed and sealed ready for tiling Monday.


Bath installed in Main Bedroom en suite
Stone top for WIR dressing table delivered, but still to be installed.


 The custom joinery robe for the Guest bedroom has been ordered.
Obtaining quotations for the lounge room fireplace. Scary. Very, very scary!
 Kitchen and Laundry joiner decided upon. Waiting for 3D drawing before finalising design.
Obtaining quotations for Stone Walling features...

I've also bought a few more decor bits 'n pieces for the house which I'll post soon!

Hooray for progress!!!!!


Renovating? Building? Got some House Projects to complete?
Join in! #YOTH15
(also on instagram of course!) 

Missed the progress? Catch up here: 
February / March
January / February


x KL
Thank you for stopping by my blog. 
You are very welcome and encouraged to comment, I love receiving feedback!

16.1.13

Work: The Point Frederick Project

 I thought I'd give you a wee peep at a house David has been building ... he's about 8 weeks off hand over so it is starting to look a bit interesting! I posted about it HERE once before, regarding the stair design. This is where it's at today...


The inspiration picture is above left whilst the installed stairs, still protectively covered, unstained and without handrails are right. All walls are sealed / undercoated only.
Mammoth entry door with alcoves, either side for joinery, below.


The gas fireplace is framed and the floating plinth constructed. The cost of the plinth in poured concrete was so prohibitive that it was nearly deleted entirely. Instead it will be faced with a concrete-look render which is then polished to look like the real thing. Hopefully! I investigated having an Axolotl finish in faux concrete which was very competitively priced. (see my address book on the right tool bar for details) I am very interested in seeing this element completed!


The concrete plinth references and ties together the concrete flooring used in other areas. The formal lounge and dining having solid black butt flooring whilst the bedrooms, tonal grey carpet.

In the picture below you can also see the built-in blind pelmets and frameless sash windows which feature throughout the house.  Looovely!


The bathroom areas have matte grey floor tiles, selected to visually reference the polished concrete used in the entry and family room areas. They are very dusty at the moment but look great! Hydronic heating will keep all the floors toasty in winter.


With the addition of custom made stainless steel drainage, the concrete floors continue on the same level both inside and out. Poor iPhone pic... sorry!


 The floor plan created a nifty external courtyard between a guest wing and the family room. The doors from each area being secreted 'pocket' style so when open they literally disappear. 


The kitchen is being installed today so there will be more progress pics in a follow-up post. 
I'm not involved in the specification of this project, the owners are more than capable but I think David has made some excellent detailing calls to help them achieve their vision. And of course his workmanship is very evident too. *pat, pat* LOL!
Hope you enjoyed this little tour of the stuff that takes precedence on us finishing Le Hacienda!


x KL

Thank you for stopping by my blog. You are very welcome and encouraged to comment. I love receiving feedback! I also love watching a new pretty picture box added to my followers - would love you to join me so I can get to know you too!

4.1.13

Plastering Fīnālis!


After another mammoth day, the lounge room plastering is finished!
That completes all the areas upstairs. Whoop Whoop!!!! The most exciting thing though was watching the creation of our fireplace...it's going to be a beauty at just over two metres wide!
(The idea for it posted before, HERE & HERE)

Hopefully David can tave a few days R & R now...

x KL

Thank you for stopping by my blog. You are very welcome and encouraged to comment. I love receiving feedback! I also love watching a new pretty picture box added to my followers - would love you to join me so I can get to know you too!

11.10.12

Progress pics!!!! Woop! Woop!

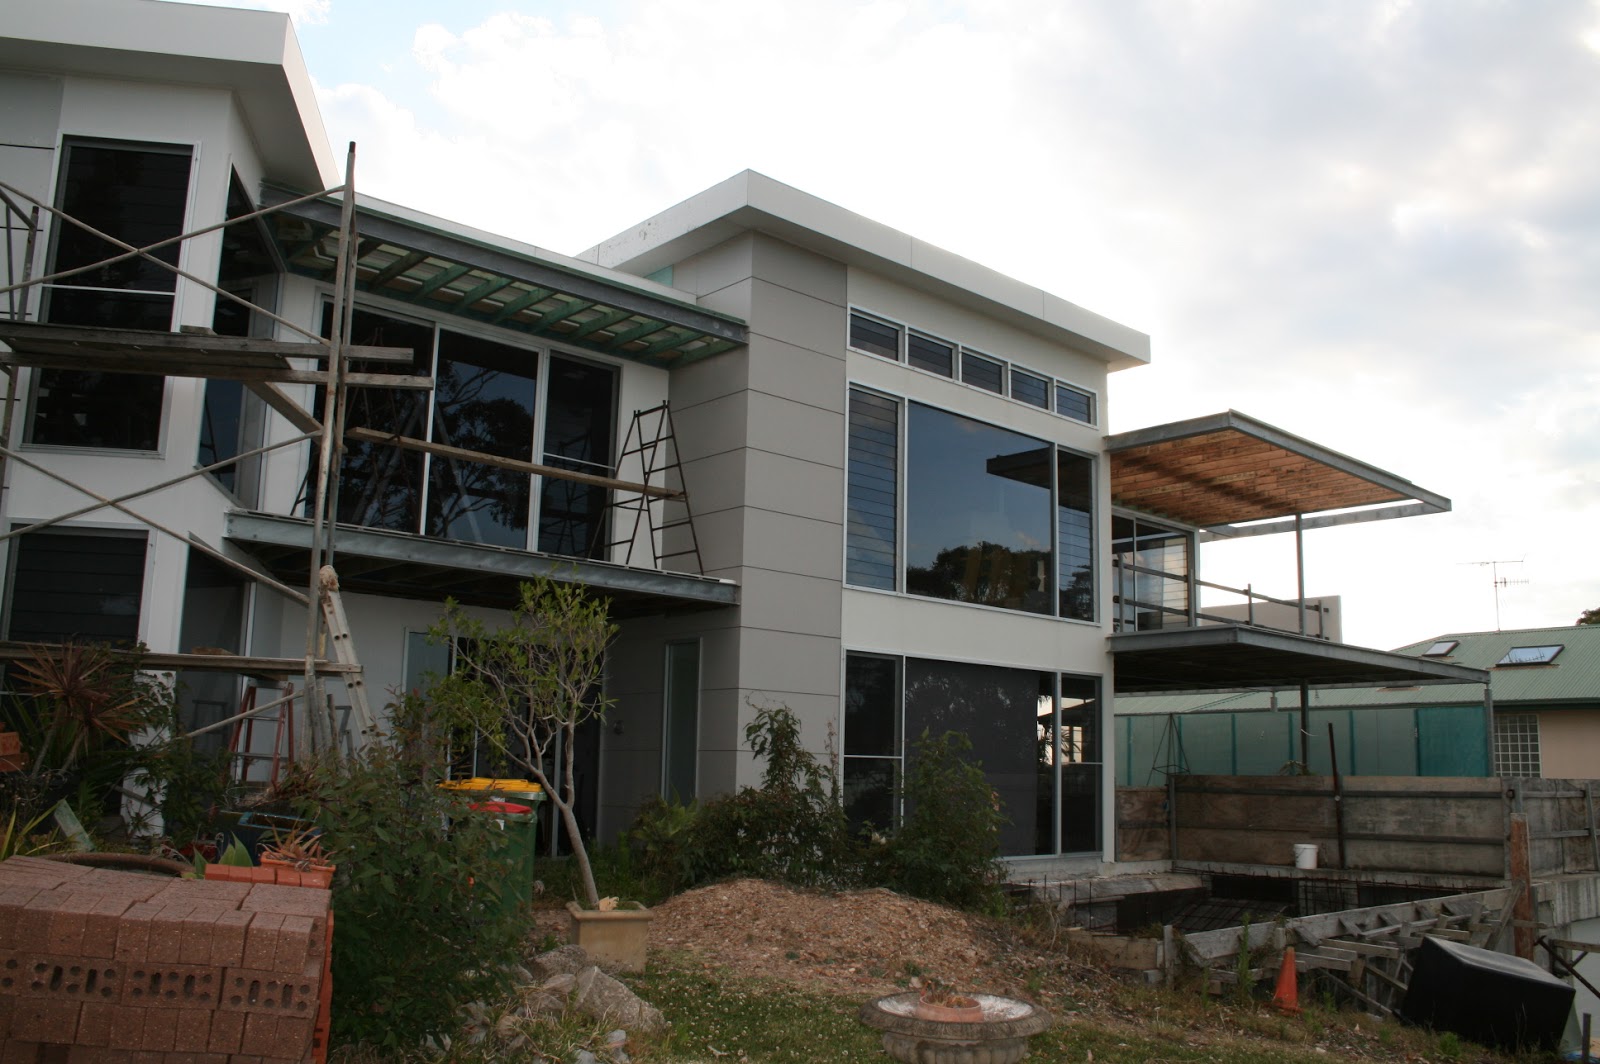
 The exterior of our place had not changed much from the picture below (snapped about 18 months ago) till recently.


But the snap above, taken on the weekend, shows some progress! Blueboard privacy wall to lower deck area on far RHS, the solid handrails to the upper deck, again on RHS of picture and most recently the framing for the two front, upper deck roof areas which were previously just steel skeletons!
Of course the weeds and mess in the front yard has increased exponentially. LOL!

It might not seem allot BUT, the Ripple Effect applies to construction too. To do x, a, b and c need to be completed first and once x is done, y and z are easy peasy! Are you still with me?


 In order to gyprock and Villaboard the remaining upstairs rooms (main bed, ensuite, lounge, dining and J's bathroom / powder room), all this 'stuff' had to go. Hence this timber pile has now become the veranda roof! The insulation will go into the walls and ceilings just prior to sheeting and I've been eBay-ing and filling Vinnie's Bins like a mad woman! Below is the result! Da Dah!!!!
David even drew the bed on the floor for me so we could work out the lighting placement!


 Final decisions about the lounge fireplace design have been made and this crude cardboard cut out helped in this major decision. There ARE some benefits of building slowly and living in the build at times!


Apologising to all the clever IT knowledgeable persons reading; I had 'a go' at the rendering above. Roughly to scale, it reinforced that we are on the right track!
It may have taken me 4 hours....but has given me priceless confidence!

You can see in the image above too, the 'coved' ceiling which will hopefully look something like this:

And the bookshelf I'm planning for the LHS of the fireplace, whose inspiration you've seen before HERE, is below.

Exhausted yet? I am! Tell me your thoughts...please!!!!
Still got lots more to share too...

x KL

Thank you for stopping by my blog. You are very welcome and encouraged to comment. I love receiving feedback! I also love watching a new pretty picture box added to my followers - would love you to join me so I can get to know you too!