Today, I am beyond excited!
After such a l o n g hiatus, the wee bit of
recent progress has meant that David can order the sheeting materials for the remaining, unfinished rooms upstairs!
The final delivery of Gyprock and Villaboard is on it's way!!!! Yay!!!!!
Finalising the finish of those rooms has consequently become a high priority.
Luckily it's a process I really enjoy. I'm the 'ideas' person on this build (although David is quite visionary) and detailing means lots of discussion, illustration finding and usually compromise because of budget constraint.
Architects can provide this additional service and volume builders have pre-prepared finish options that are usually part of their construction contract. In this project - our own home, we are the designers, builder and owner and are therefor fortunate to be able to modify as we go and as rooms take shape.
If I had the budget though I would always engage an architect for this; their skill and creativity add that elusive WOW factor every time!
I thought I'd post our detailing process, starting with the Main Bedroom En suite.
The basic plan for this room was established at the drafting stage and submitted to council. The generous 4200 x 2500 mm space allowed multiple layout configurations but the floor to ceiling windows on the left and top left of the room limited this area's use to a freestanding tub. I like walking into a bathroom and facing the vanity hence it's location, which left the right wall free for the shower and W.C. The plumbing was installed with the initial frame build and is no longer negotiable. So now for the detailing! This is where those
ideas files become gold!
We have magnificent ocean views and the large windows were chosen to balance an identical pair in the Guest bedroom underneath. Just outside the en suite will be a small lounge area within the main bedroom (position photo taken from) and to maximise those views the doorway was enlarged and
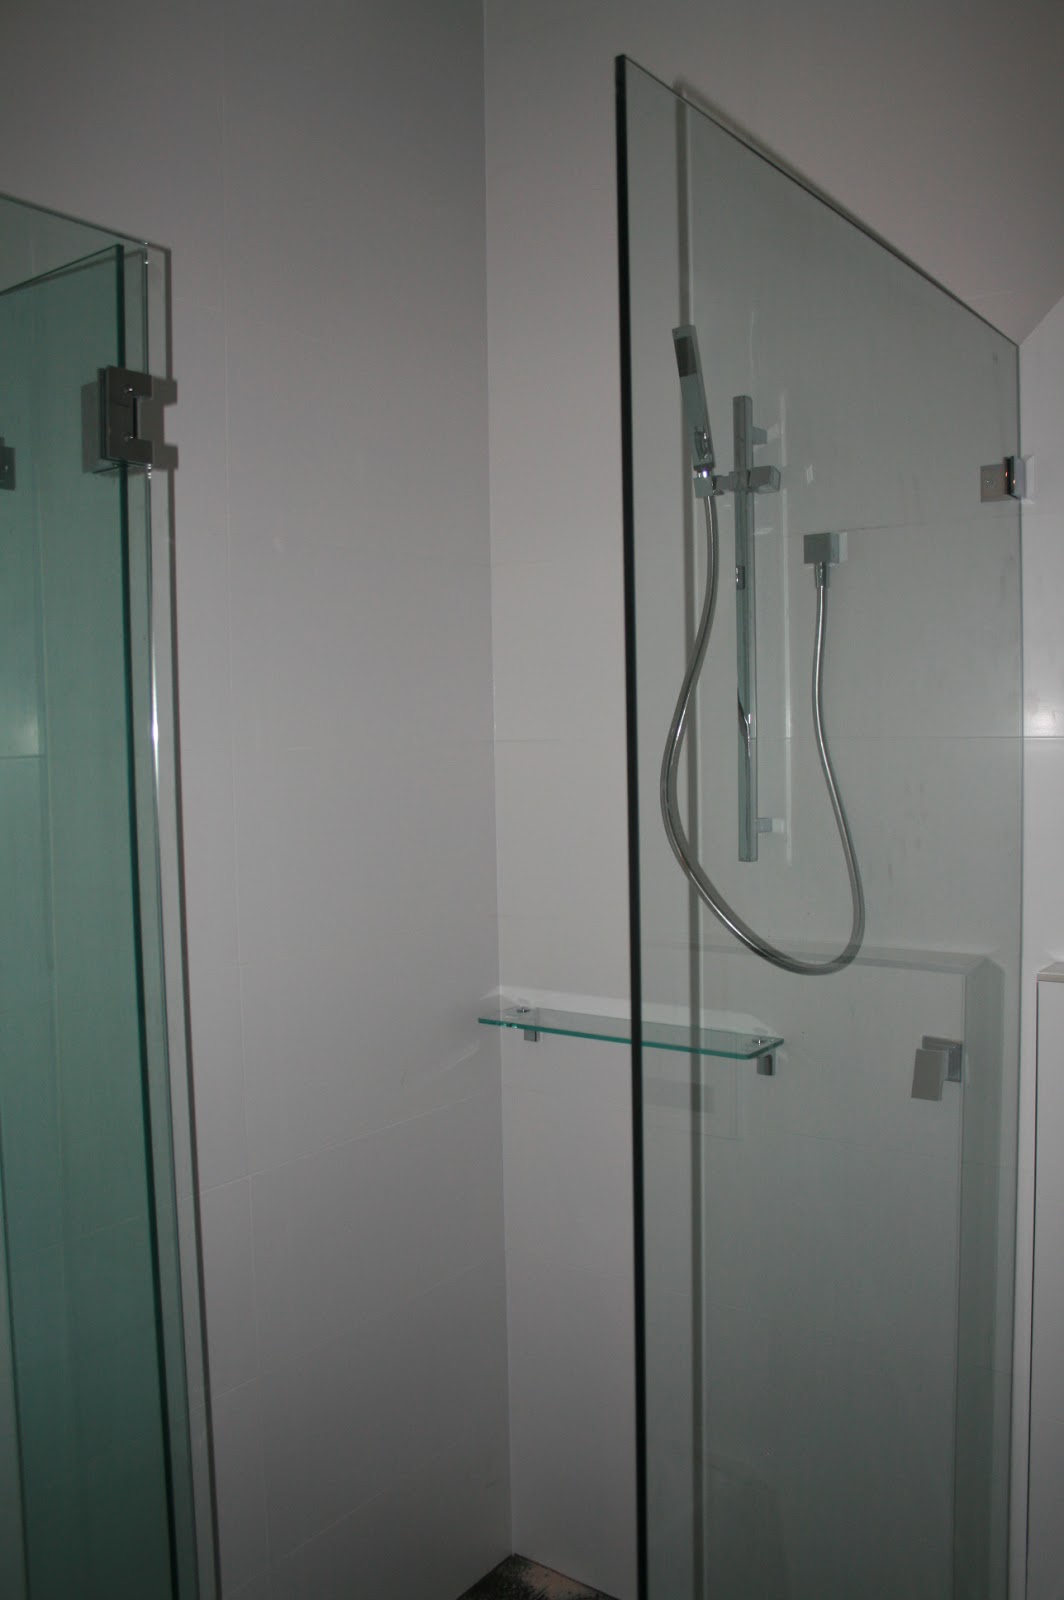
two cavity sliding door units installed. During the day, for privacy reasons, (duh!) we decided to pop the loo and shower into
frosted glass door cubicles. This means still utilising natural light and keeps the room feeling expansive. I first spotted the idea after staying at
The Westin Hotel in Sydney.
 |
| The Westin Hotel, Sydney Bathroom detail |
The windows will need to be well covered at night though, so block out blinds will be installed. I really wanted sheers in front but haven't got enough room between the window and bath. My absolute dream was Plantation Shutters but we can't do this due to the louvre windows already installed.
*sob*.
I've asked David to
'box-out' the top of the windows and build a small
bulkhead over the vanity so the blinds can hide in their own little slot when up. It protects them from dust too.
 |
| A blind 'slot' in J's semi finished bathroom |
We
lowered the ceilings in the cubicles so that we can have a
'cove' light on the back wall and so that the water from the ceiling integrated rain shower (posted about
HERE) isn't cold before it hits you! LOL!
 |
| We have this type of indirect lighting in the main bathroom downstairs too. |
A wall between the shower and toilet will incorporate a wide
shampoo shelf and there will be
heated towel rails on the nib wall between the shower and toilet doors.
I wanted to make this space feel really indulgent so
display space was important. I was horrified at the cost of freestanding bath outlets too so solved both these issues with a
deep alcove at the foot of the bath which will also accommodate a standard bath spout. We spent ages working out how to incorporate low voltage lighting to each shelf for mood but gave that idea the flick in the end. I don't want the room to be O.T.T, just elegant and serene. (And isn't that what fragrant candles are for?)
Less is more. Less is more. Less is more.
.jpg) |
| The image on the right was my inspiration for a display alcove. |
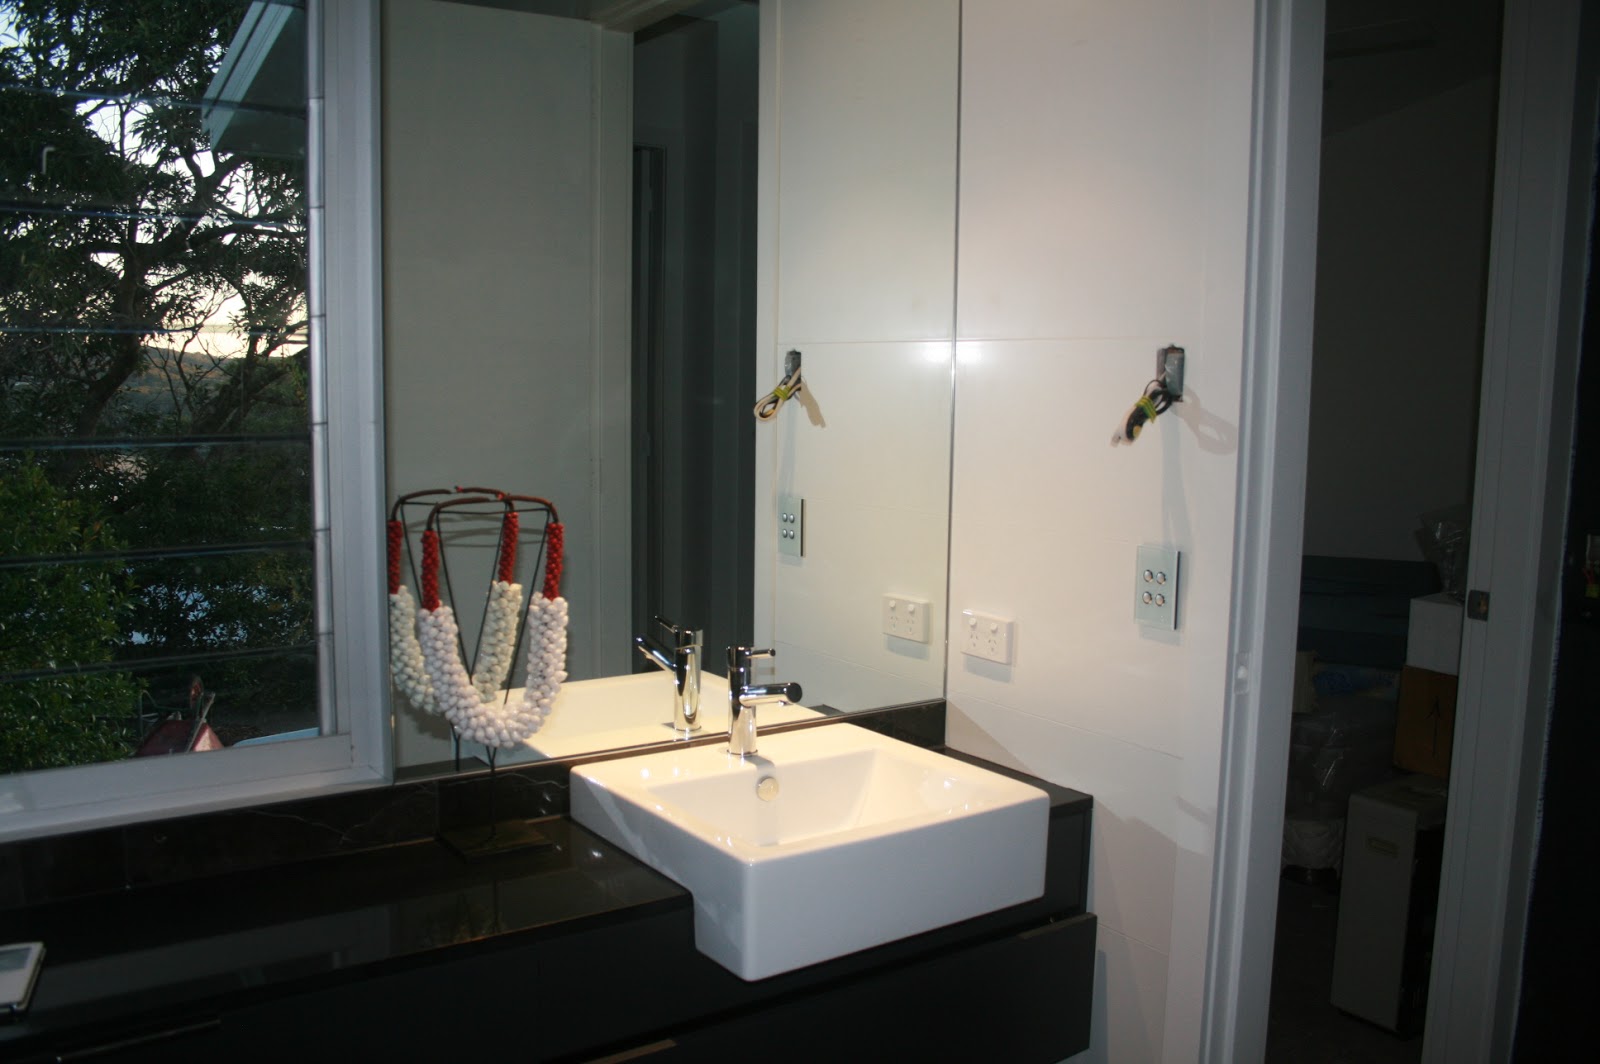
The vanity will be
wall hung as planned elsewhere, with
mirrored shaving cabinetry above.
We're adding
lighting under these cabinets and providing
power inside to hide all the ugly but necessary bathroom stuff like electric toothbrushes, shavers and hairdryers. The picture below looks pretty much like my mental image though we will have
budget conscious semi-recessed basins.
The finishes will match those in the downstairs bathrooms;
swishy marble floors and
cost effective 600 x 300
white vitrified tiles. I loved the shell mosaics I chose for the
Terrigal project and featured in the en suite above and am debating whether to use them as a splash back detail too. Then again, using the same marble that's on the floor would look good too. I have a bit more time to ponder that decision. If there's flooring left over it will seal the deal. The Mother of Pearl mosaics are very expensive even if used for a tiny area.
These are the fixtures which I have chosen so far:
Gerberit In-wall cistern
Caroma Cube Wall hung Toilet
Sussex Scala Basin Mixers
Parisi Box Semi recessed basins
Kado Lure freestanding bath
Kado Quad heated towel rails
Rogerseller Cloud Cover shower
This was a mammoth post....hope it wasn't boring as bat sh*t for you!
Would love to hear your much appreciated feedback on my plans!
UPDATE EDIT: 3.01.13
http://eternalicons.blogspot.com.au/2013/01/new-yearnew-progress.html
x KL
Thank you for stopping by my blog. You are very welcome and encouraged to comment. I love receiving feedback! I also love watching a new pretty picture box added to my followers - would love you to join me so I can get to know you too!


.jpg)


.jpg)


